
The bounty of summer berries is always inspiring me for new ways to use them! I saw some gorgeous raspberries, and of course my brain immediately started pairing them with other delicious flavors. Pistachios, honey, vanilla...the resulting creation was these delicious Raspberry Tartlets with Pistachio Crust!

This post may contain affiliate links, and as an Amazon Associate I earn from qualifying purchases. I’ll never link to anything I don’t use and love! Click here for full disclosure and privacy policy.
These Raspberry Tartlets have a pistachio tart crust filled with a honey-raspberry jam topped with toasted honey meringue! These mini tarts are such a fabulous summer dessert!
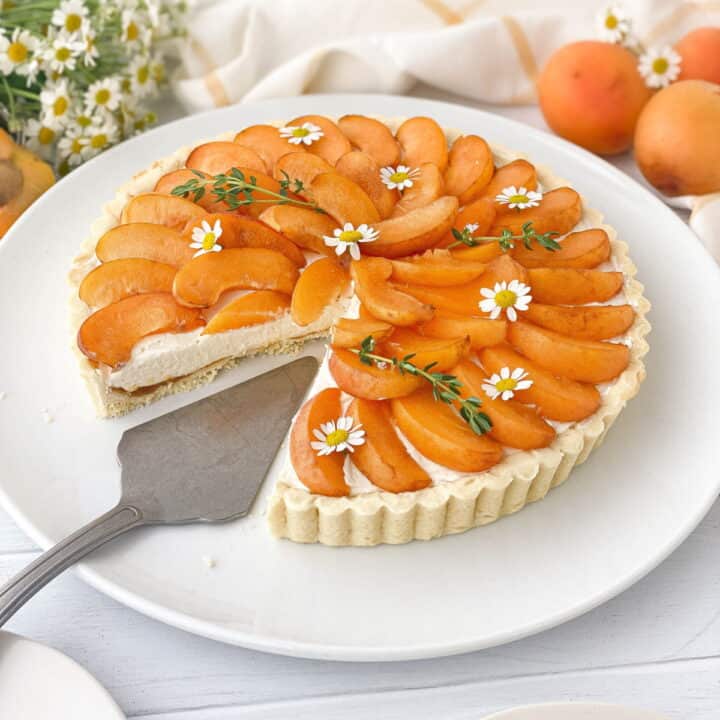
If you enjoy these tartlets, you may also like my recipes for my Raspberry Cookies, Apricot Tart, and Raspberry and White Chocolate Loaf Cake!

Raspberry Tartlet Ingredients
This recipe is almost entirely ingredients you're sure to find at your local grocery store, with two possible exceptions:
- Vanilla bean paste: It's no secret that I LOVE this ingredient! Easier/cheaper than buying whole beans and tastier than extract (or at least I think so)! If you don't have vanilla bean paste, you can find it here. If you prefer to substitute, you can use an equal measure of vanilla extract.
- Cake flour: The cake flour ensures that your tartlet crusts are more tender! If you don't see it locally, you can find it here. You can substitute the cake flour with all-purpose flour if that's all you have on-hand, the crusts just won't be as tender.

Having the Right Equipment
- I used 24 (ridiculously tiny) 2.5" tartlet pans (like these here). I actually only own 12 of them, so I baked the teeny crusts up in two batches. If you're not interested in making tiny raspberry jam tartlets, you do have the option of making one large tart. You may end up with more jam and pastry than you need, but you could easily make a 9" round tart with this same recipe, just increase the chill time and bake time on the tart (25-30 minutes).
- I used a kitchen torch to toast my meringue. If you don't have a torch, you can put the tartlets under the broiler, just don't take your eyes off them for a second! I prefer the torch, since it gives more control over the toasting. My torch is old, so I don't even know what kind it is, but this one (link here) has great reviews.

Making the Pistachio Tart Crust
This pastry comes together easily and is very forgiving. That means that you don't have to worry about tears in your pastry--just patch them up with some extra dough and you're good to go. You can gather and re-roll scraps, just know that the more times you do this, the tougher the crust will be.
Easy Raspberry Jam
Now that we've covered equipment and ingredients, we can move on to making the tartlets! The honey-raspberry jam couldn't be easier. You could even choose to use frozen raspberries if you'd like. Everything goes in a saucepan, gets cooked down until thick, then it gels as it cools. No pectin, no fuss. AND no refined sugar, if that's something you're concerned about!
Toasted Honey Meringue
Warming the meringue ingredients over a double boiler ensures that the sugar dissolves and that the resulting meringue is safe! After warming, the mixture gets beaten into a cloud of fluffy, white meringue! I just love the pairing of the sweet-tart raspberry jam with the sweet toasted honey meringue!

I just love these little gems, and I hope that you do, too! Even if you're not interested in spending the time on teeny tiny tartlets (which I totally get!), the flavors and textures in this recipe are summer perfection!
Other Posts You May Like:


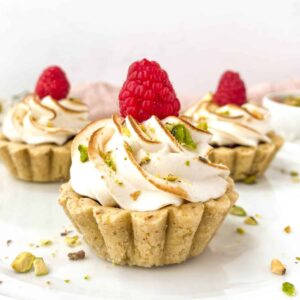
Raspberry Tartlets with Pistachio Crust
Ingredients
Honey-Raspberry Jam:
- 24 oz raspberries
- 1 cup honey
- ¼ cup lemon juice
- ¼ teaspoon salt
- 2 teaspoon vanilla bean paste (see note)
Vanilla Pistacho Pastry:
- 2½ cups cake flour (see note)
- ¼ cup ground pistachios (I used unsalted)
- pinch salt
- ½ cup unsalted butter, softened (1 stick)
- ⅔ cup sugar
- 1 egg
- 1 teaspoon vanilla bean paste (see note)
Honey Meringue:
- 2 egg whites
- 2 tablespoon honey
- 2 tablespoon sugar
- pinch salt
- 1 teaspoon vanilla bean paste (see note)
Garnish (if desired):
- raspberries
- chopped pistachios
Instructions
For Jam:
- Combine raspberries, honey, lemon juice, and salt in a large saucepan. Warm over medium-high heat, stirring often, until the mixture boils. Once boiling, reduce to a simmer and cook until thickened, about 20 minutes.
- Remove the jam from the heat and stir in vanilla bean paste (see note). Allow jam to cool while you prepare the rest of the recipe. Jam can be made ahead of time and stored in the refrigerator.
For Crusts:
- In a small bowl combine cake flour, ground pistachios, and salt. Stir to combine. Set aside.
- In the bowl of a stand mixer, beat butter and sugar until light and fluffy. Add egg and vanilla bean paste (see note) and beat to combine.
- With the mixer on low speed, gradually add the flour mixture. Mix until just combined.
- Turn dough out onto a lightly floured surface and knead slightly to form a disc. Wrap the disc in plastic and freeze 20 minutes. Grease 24 teeny 2.5" tartlet pans (see note) and set aside.
- After chilling, roll the dough out on a lightly floured surface to about ⅛" thick. Line each of the pans with the pastry, taking care not to stretch the dough as you do so. (Pastry scraps may be gathered and re-rolled as needed.) Place crusts on a baking sheet and freeze 10 minutes.
- Preheat oven to 350° F. Leaving the tartlets on the baking sheet, bake 10-15 minutes. Pastry will appear dry and very slightly browned. Allow crusts to cool completely.
For Meringue:
- In a large heatproof bowl, combine egg whites, honey, sugar, and salt. Whisk to combine.
- Place the bowl over a saucepan of simmering water, taking care that the water doesn't touch the bowl. Whisking constantly, warm the mixture to 160° F, about 8-10 minutes.
- Transfer the mixture to the bowl of a stand mixer and whip using the whisk attachment until it reaches medium-stiff peaks. Add vanilla bean paste (see note) and beat to incorporate.
For Assembly:
- Fill the cooled tartlets with the raspberry jam. I used about 2 tablespoons of jam per tartlet. Spoon or pipe meringue on top of each tartlet. Toast the meringue, if desired (see note). Garnish as desired; I topped mine each with a raspberry and chopped pistachios.Enjoy!
Notes
Nutrition Estimate
Nutrition information is provided as a courtesy and is only an estimate.


Abigail
My husband loves raspberries, so I thought I'd try this. I might use a jar of jam in a pinch, but I really liked the honey with the raspberries in the homemade jam! Will definitely make these for him again!
Amee
So happy you enjoyed the recipe, Abigail! Thanks for your review!
Ally
Hi, can you make this a day before and store it in the fridge or is it better to make day of?
Amee
Hi, Ally! You can definitely make the crusts and the raspberry jam the day before. You'll want to wait until the day you plan to serve them to make the meringue and to put them together (so your crust doesn't get soggy). Hope you love them if you make them!