
Summertime makes me think beach trips, barbeques, and tropical flavors. I had a hunch that mango would work with chocolate, and the result: this Mango Tart!

This post may contain affiliate links, and as an Amazon Associate I earn from qualifying purchases. I’ll never link to anything I don’t use and love! Click here for full disclosure and privacy policy.
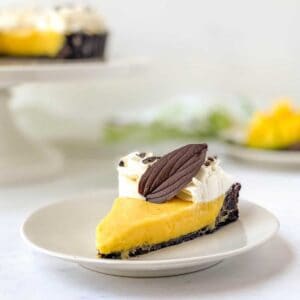
This Mango Tart is a chocolate pastry crust that's brushed with melted chocolate before being filled with mango curd and topped with freshly whipped cream and cocoa nibs! Oh, and the prettiest chocolate leaves ever! <3 I don't think anyone could turn down this cool, refreshing treat during the heat of Summer!
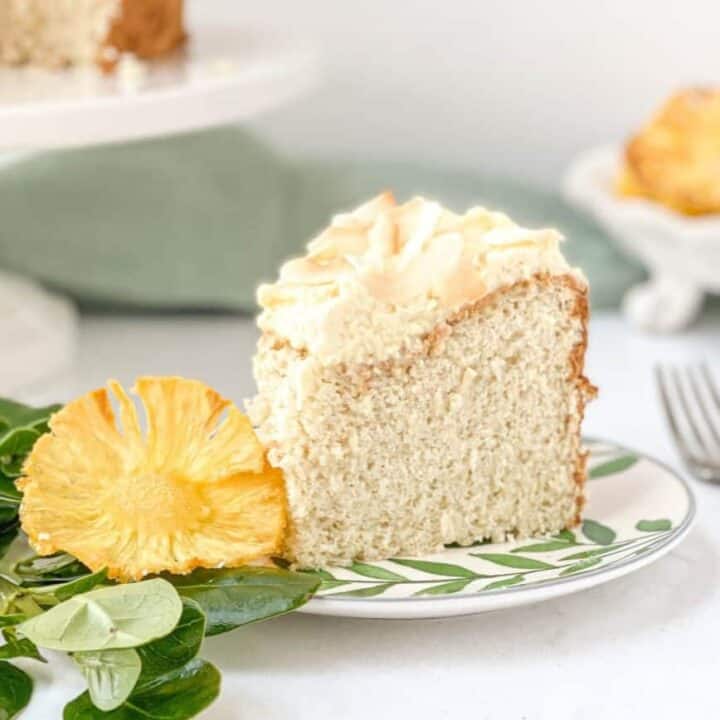
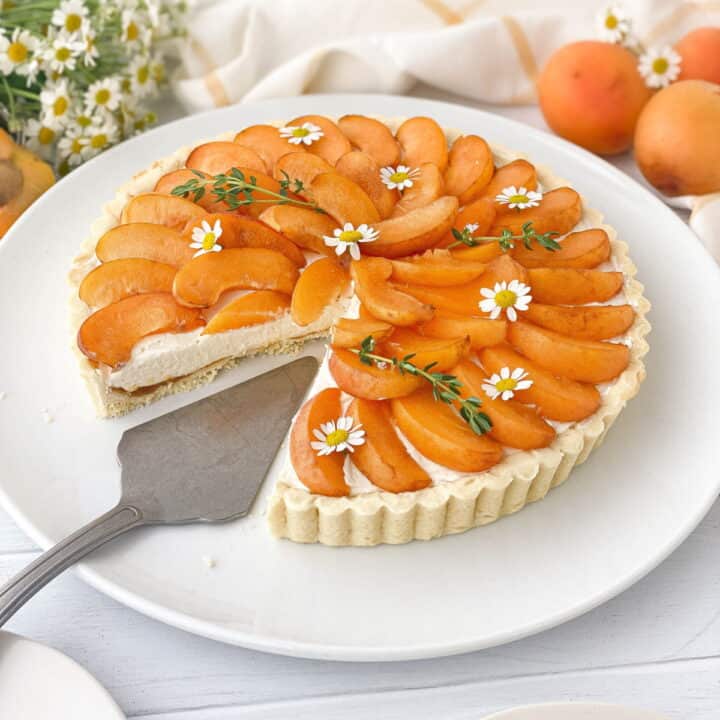
If you enjoy this recipe, check out the posts for my Blueberry Curd Tart, Apricot Tart, and Tropical Angel Food Cake!

Tools for Your Mango Tart
This recipe calls for a 9" tart pan with removable bottom, like this one here. I like lighter color pans (as opposed to the darker, nonstick pans) because the crust browns more slowly.
There are a few other tools that I used that aren't technically necessary, but will make your life a bit easier:
- While a pastry blender isn’t necessary to cut in the butter, it does make the job a lot faster and easier. If you’re looking to buy one for yourself, you can find one here.
- Pie weights help when blind-baking a crust, keeping the dough from rising/getting bubbles as it bakes. This makes sure that you have the room that you need for filling. You can buy actual pie weights if you’d like (like these here), but I just use black beans. They’re cheap and you can use them over and over again.
- I like using a bowl scraper to work the dough because it's flexible shape makes the job much easier, and keeps your hands warming the dough as it comes together. They're easy to store and easy on the wallet! If you'd like to buy one for yourself, you can find one here.

Notes on Mango Tart Ingredients
The ingredients for this recipe are pretty straightforward, but there are two that could be considered "specialty" ingredients:
- Chocolate Extract - I highly recommend this (sometimes overlooked) extract! It lends amazing depth of flavor to chocolate baked goods! If you can't find it in your local grocery store, you can find some here. Even better, make yourself some Homemade Chocolate Extract for next time!
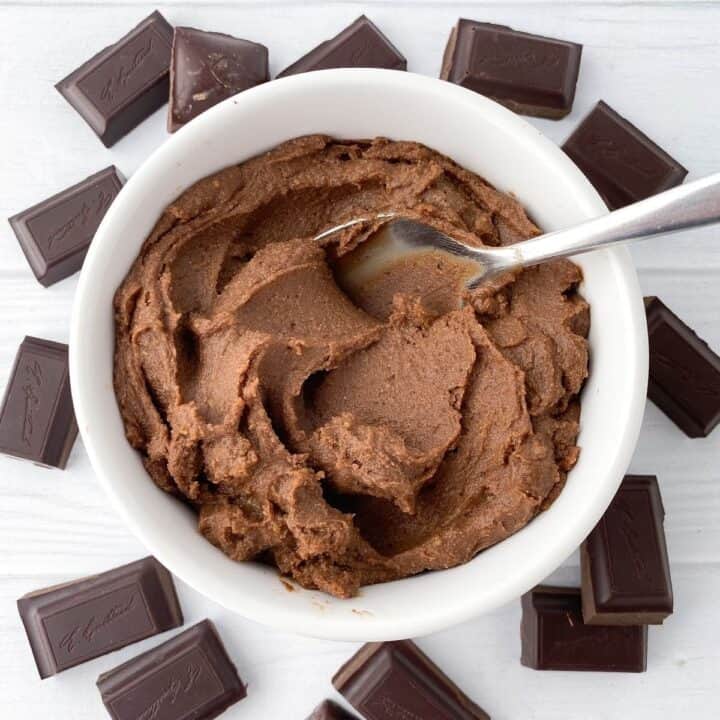
- Chocolate Coating - In this case I mean the packaged chocolate coating that you can get at the grocery store, and not just regular chocolate. I pretty much never use this stuff, because I think regular chocolate is far more delicious! In this case, though, it was only being used as a garnish and I was worried about properly tempering chocolate for applying to leaves (as one does), and decided to go with a product more likely to succeed.
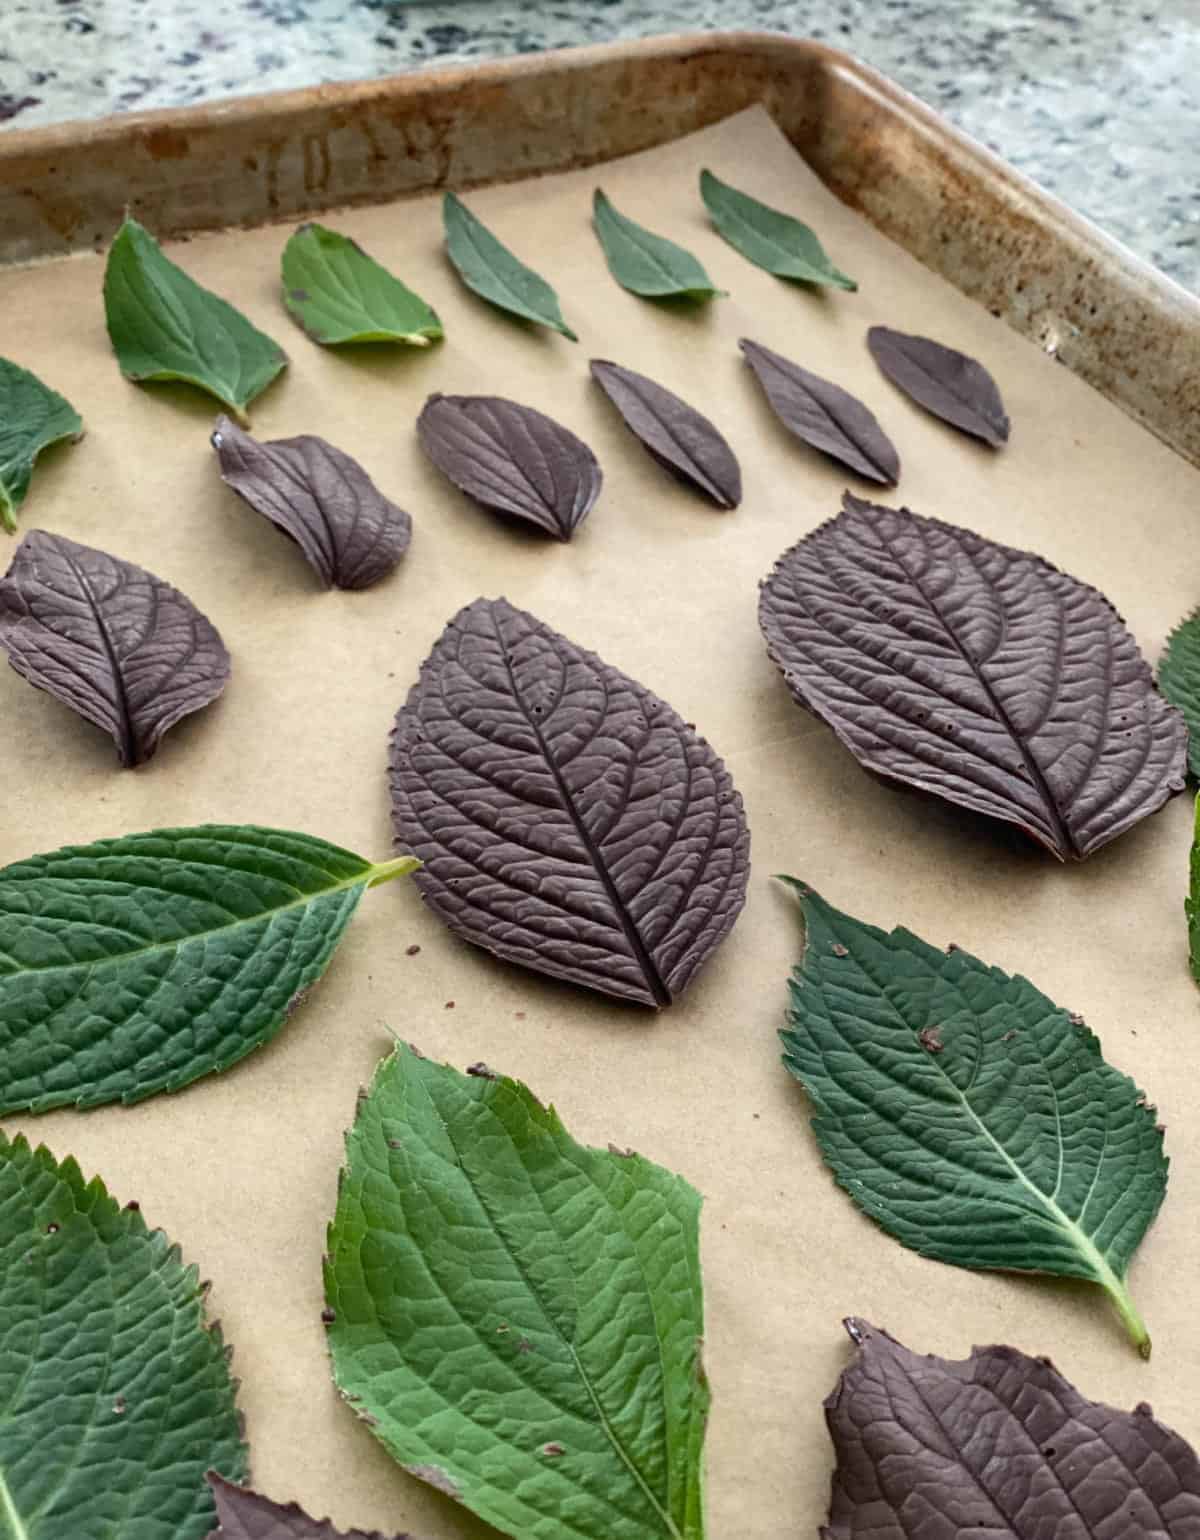
How to Make Those Chocolate Leaves!
They're easy, I swear! I had no clue if this would work out when I started, and then the leaves turned out beautifully! Here's the process that I used:
Prep!
- Gather leaves that you'd like to recreate in chocolate for your tart! Make sure that you're using leaves that haven't been sprayed with harmful chemicals! I took leaves from my own garden, so I knew that they were safe to use. Choose a variety of shapes, sizes, and textures so you have options when garnishing your tart!
- Line a baking sheet with parchment or waxed paper to place the chocolate-coated leaves on. This makes moving them easier. I like to use this non-stick parchment that you can find here.
- Melt chocolate coating according to package instructions. The amount that you'll need will depend on the size and number of leaves that you choose. I made about twice the amount of chocolate leaves that you see pictured, and used about 4 oz of chocolate coating.
Let's Do This!
- Apply the chocolate to the *underside* of each leaf using a small (and clean!) paintbrush. Applying to the underside ensures that you have the most detail when your chocolate leaves are done! Don't be stingy with the chocolate, and ensure that you're getting into all the nooks and crannies. The more careful you are at the edges, the better the detail will turn out on the edges of the leaves. Allow the chocolate to set.
- Apply a second coat of chocolate. Depending on how thickly you're applying the chocolate, you may need a third coat. You just need the set chocolate to be sturdy enough to peel the leaves off and to be able to be handled without breaking. Allow the chocolate to set completely (you can transfer the leaves to the refrigerator to speed this process).
- Carefully peel the leaves off the chocolate once they're completely set. That's it! <3

Assembling Your Tart
You've done all the hard work--now you just need to assemble your tart! I brushed melted chocolate on the inside of the cooled crust. This chocolate will both add flavor and protect the crust from getting soggy too fast (I still recommend waiting to assemble the tart until as close to serving time as possible). Add the chilled mango curd, top with freshly whipped cream and your choice of garnish, and you're ready to eat!!

I'm super happy with how this recipe turned out! I had a hunch about chocolate + mango and about those chocolate leaves, and both paid off! This one is definitely going to be on my list of tried-and-true Summer desserts from now on!
Other Posts You May Like

Mango Tart
Ingredients
Chocolate Pastry Crust:
- 1 cup flour
- ¼ cup dark cocoa powder
- 3 tablespoon sugar
- ¼ teaspoon salt
- 5 tablespoon unsalted butter, cold and diced
- 5 tablespoon water, cold
- ½ teaspoon chocolate extract (see note)
- 2 oz chocolate, melted (for brushing on baked crust; I used 60% cacao)
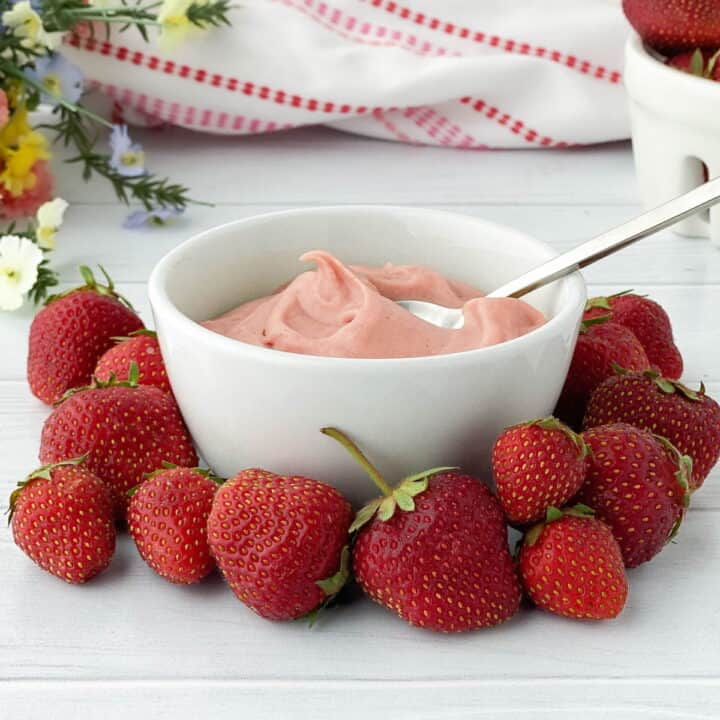
Mango Curd:
- 2 cups mango purée (~2 mangos or 20 oz frozen, diced mango)
- ½ cup sugar
- 3 tablespoon lime juice
- pinch salt
- 6 egg yolks
- 6 tablespoon unsalted butter, diced and softened
Whipped Cream:
- 1 cup heavy (whipping) cream, cold
- 3 tablespoon powdered sugar
Chocolate Leaves/Garnish:
- cocoa nibs
- 5 oz chocolate coating, melted (see note)
Instructions
For Crust:
- In a large bowl, combine flour, cocoa, sugar, and salt. Stir to combine.
- Add the cold, diced butter and cut into the flour mixture with a pastry blender (see note) until the largest pieces of butter are pea-sized.
- Add the cold water one tablespoon at a time until the dough gathers into a ball. I found using a bowl scraper (see note) helps to get the dough to come together without your hands warming the butter. Wrap the dough and chill for 30 minutes.
- After chilling, roll the dough large enough to fit your tart pan (see note) on a lightly floured surface. Line the pan with the dough, and place in the freezer for 30 minutes.
- Preheat the oven to 375° F. Line the crust with foil and fill with pie weights (see note). Bake 20 minutes, then remove the foil and pie weights. Return the crust to the oven and bake another 8-10 minutes. Allow the crust to cool completely in the pan on a wire rack.
For Curd:
- Combine mango purée, egg yolks, lime juice, and salt in a medium heatproof bowl. Place the bowl over a pan of simmering water, taking care that the water doesn't touch the bottom of the bowl. Cook the mixture, stirring constantly, until thickened.
- Once thick, add the butter a few pieces at a time and stir until melted and incorporated. If you'd like to ensure a smooth curd, you can strain it through a fine-mesh strainer at this point.
- Pour the curd into a bowl and cover with plastic, pressing the plastic to the surface of the curd to ensure it doesn't form a skin while cooling. Place in the refrigerator until chilled, at least 2 hours.
For Whipped Cream:
- Place cold heavy cream and powdered sugar in the bowl of a stand mixer fitted with the whisk attachment. Start the mixer on low speed, and gradually increase the speed to high. Whip until the cream thickens and forms peaks.
For Chocolate Leaves:
- Gather leaves that you'd like to recreate in chocolate for your tart! Make sure that you're using leaves that haven't been sprayed with harmful chemicals! I took leaves from my own garden, so I knew that they were safe to use. Choose a variety of shapes, sizes, and textures so you have options when garnishing your tart!
- Line a baking sheet with parchment (see note) or waxed paper to place the chocolate-coated leaves on. This makes moving them easier.
- Melt chocolate coating according to package instructions. The amount that you'll need will depend on the size and number of leaves that you choose. I made about twice the amount of chocolate leaves that you see pictured, and used about 4 oz of chocolate coating.
- Using a small (and clean!) paintbrush, apply the chocolate to the *underside* of each leaf. Applying to the underside ensures that you have the most detail when your chocolate leaves are done! Don't be stingy with the chocolate, and ensure that you're getting into all the nooks and crannies. The more careful you are at the edges, the better the detail will turn out on the edges of the leaves.
- Allow the chocolate to set, then apply a second coat. Depending on how thickly you're applying the chocolate, you may need a third coat. You just need the set chocolate to be sturdy enough to peel the leaves off and to be able to be handled without breaking.
- Once the chocolate has completely set, carefully peel the leaves off of the chocolate. That's it! <3
For Assembly:
- Brush the melted chocolate on the inside of the cooled crust. This chocolate will both add flavor and protect the crust from getting soggy too fast (I still recommend waiting to assemble the tart until as close to serving time as possible).
- Once the chocolate is set, spoon the mango curd into the crust and smooth the top.
- Spread or pipe whipped cream on top of the tart, and top with cocoa nibs and chocolate leaves, if desired.Enjoy!
Notes
Nutrition Estimate
Nutrition information is provided as a courtesy and is only an estimate.


Mark
We really enjoyed it! I might make just the mango curd again as a summer treat.
Amee
Yesss a little of this mango curd in the freezer is a fantastic summer treat! So happy you enjoyed the recipe, and thanks so much for your review, Mark!
Bre
The proportions and flavor of the recipe is self is great. However, some vital instructions are missing, like when to add the sugar to the curd and when to take if off the heat. I had to cross check other recipes when I couldn't find that information since I had never made a curd before. It would be great if you could update the instructions with the missing details.